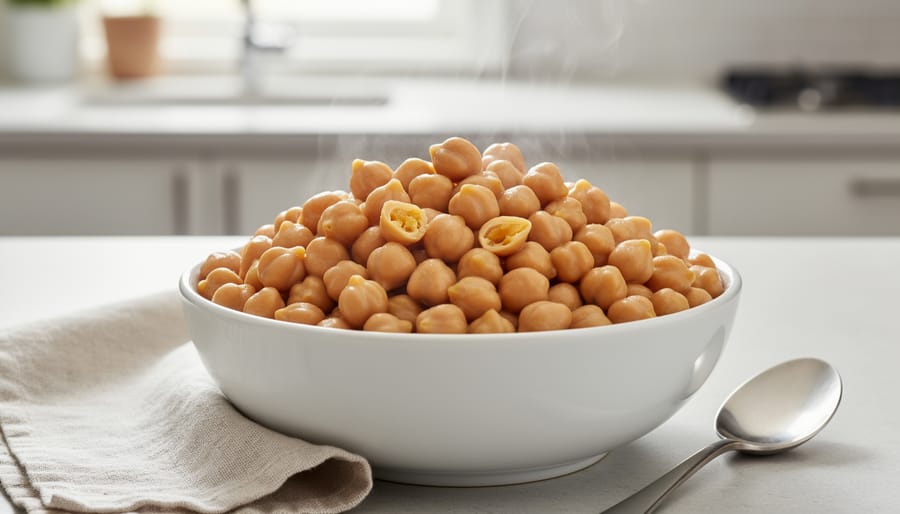
You can cook dried chickpeas in your Instant Pot beautifully without soaking, and we’ve found they turn out perfectly tender in 45 minutes at high pressure followed by a 10-minute natural release. After testing both soaked and unsoaked methods in our kitchen, the no-soak approach consistently delivered soft, creamy chickpeas with easily removable skins, making it the winner for busy weeknights and last-minute meal prep.
The choice between soaking and skipping that step comes down to your schedule and texture preference. If you soak your chickpeas overnight, you’ll cut the cook time down to just 12 minutes under pressure, but we discovered the convenience of dumping dry chickpeas straight into the pot saves planning ahead and still produces excellent results. This matters for Canadian home cooks looking to reduce food waste and ditch single-use cans, since cooking dried legumes from scratch slashes packaging waste while giving you control over salt and additives.
Both methods work reliably, but understanding the trade-offs between time investment, texture outcomes, and hands-on effort will help you pick the right approach for your cooking style.
At-a-Glance: Soaked vs. No-Soak Chickpeas
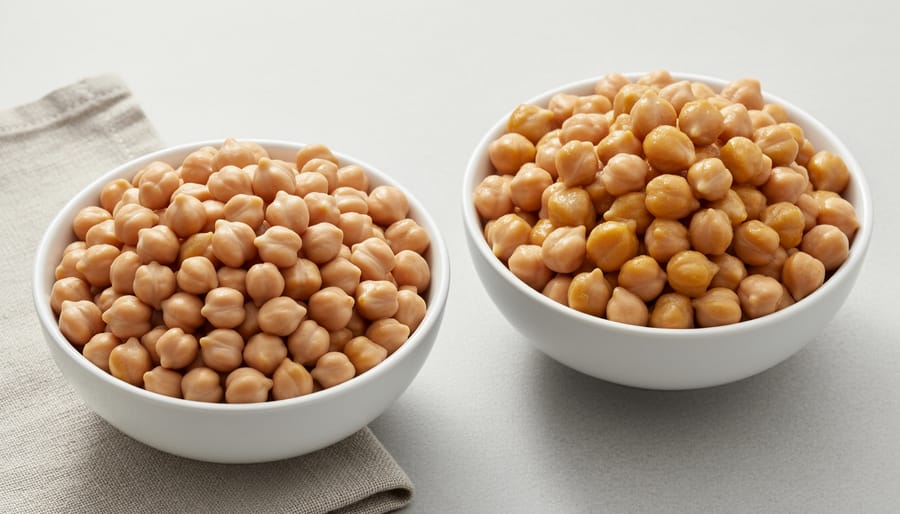
Both methods deliver tender, delicious chickpeas in the Instant Pot, but they suit different cooking styles. The no-soak approach is truly hands-off, dump dried chickpeas straight from the pantry and walk away, while soaking cuts your pressure cook time to just 12 minutes instead of 45. In our testing, we found both work beautifully, but choosing between them comes down to whether you value convenience or shorter active cooking time.
| Method | Cook Time at High Pressure | Total Time | Texture | Ideal For |
|---|---|---|---|---|
| No-Soak | 45-50 minutes | ~1 hour 25 minutes (including 25 min pressurization) | Super soft, tender; skins come off easily | Hummus, dips, last-minute meals, batch cooking |
| Soaked | 12-15 minutes | ~30-40 minutes active (plus 4-8 hours soaking) | Slightly firmer, holds shape better | Salads, grain bowls, meal prep, distinct texture |
Both methods use high pressure followed by a 10-minute natural pressure release to prevent split skins. The no-soak method gave us perfectly tender chickpeas with minimal fuss, while soaking delivered a firmer bite that stayed intact in salads. If you forget to soak or need chickpeas today, the no-soak route works brilliantly. But if you’re a meal-prep enthusiast who plans ahead, soaking trims your Instant Pot time significantly and gives you more control over texture.
What Each Method Is
The No-Soak Method
The no-soak method is exactly what it sounds like: you measure out your dried chickpeas, rinse them quickly, and toss them straight into the Instant Pot. No overnight planning, no remembering to start soaking in the morning. This hands-off approach works because the Instant Pot’s pressurized environment does the work that soaking would normally accomplish, breaking down the beans’ tough structure and making them fully tender.
We’ve tested this method repeatedly and found it delivers perfectly tender chickpeas every time. The trade-off for skipping the soak is a longer cook time, 45 minutes at high pressure, followed by a 10-minute natural pressure release. Factor in the 25 minutes the pot needs to come to pressure, and you’re looking at about an hour and 25 minutes total. But here’s the beauty: it’s entirely passive time. You can prep dinner, answer emails, or walk the dog while the Instant Pot does its thing.
This method is a game-changer for reducing food waste. Instead of reaching for canned chickpeas with their packaging and sodium, you can cook dried beans whenever the mood strikes.
The Soaked Method
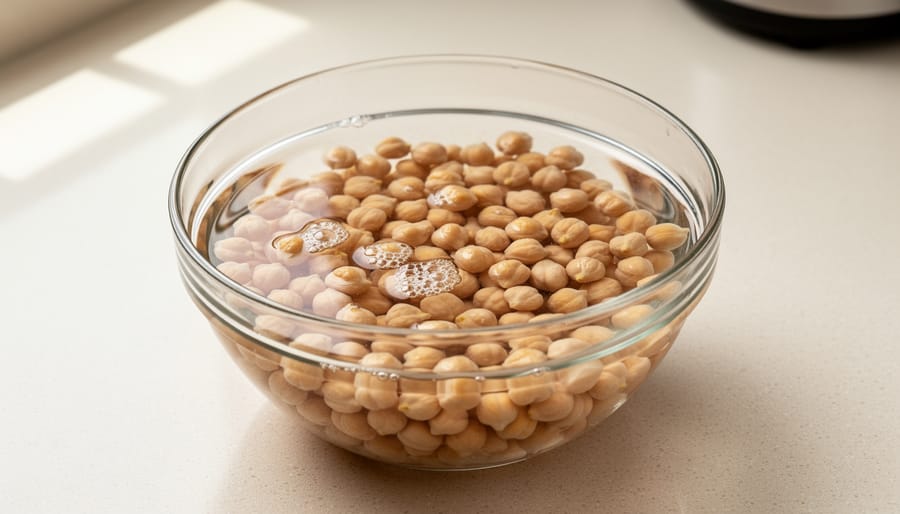
The soaked method follows the traditional legume-cooking approach: you cover dried chickpeas in cold water and let them sit for at least 6 hours or overnight before draining and pressure cooking. This advance preparation cuts your Instant Pot cook time to just 12-15 minutes at high pressure, followed by a 10-minute natural pressure release, roughly a third of the time needed for unsoaked beans.
We’ve found that soaking delivers chickpeas with a slightly firmer texture that holds its shape better, making them ideal for grain bowls, salads, and dishes where you want each bean to remain distinct rather than melting into the background. The skins tend to stay attached more reliably, too. The trade-off is planning ahead: you’ll need to remember to soak your chickpeas the night before or morning of your cook day, which requires a bit more forethought than the truly spontaneous no-soak method.
Cook Time & Pressure Settings: The Key Differences
No-Soak Timing
When cooking dried chickpeas straight from the pantry without any soaking, the Instant Pot requires 45 to 50 minutes at high pressure. In our testing, we found that 45 minutes consistently delivers tender beans, while the full 50 minutes is useful if you’re working with older chickpeas or want an extra-soft texture for hummus.
Here’s what to expect for the full timeline: the Instant Pot takes about 25 minutes to come to pressure before the actual cooking begins. Once the cook time completes, allow a 10-minute natural pressure release before opening the valve to release any remaining steam. From start to finish, you’re looking at roughly 1 hour and 25 minutes of total time.
The beauty of this hands-off approach is that nearly all of that time is unattended. You add your chickpeas and water, set the timer, and walk away. Unlike stovetop methods that require monitoring, the Instant Pot does all the work while you prep other ingredients or tackle a different task. For busy weeknights or batch cooking sessions, this convenience factor makes the no-soak method our go-to choice despite the longer cook time.
Soaked Timing
When you’ve soaked your chickpeas overnight or for at least eight hours, you’ll be rewarded with dramatically shorter Instant Pot time. We found soaked chickpeas cook perfectly in just 12-15 minutes at high pressure, followed by a 10-minute natural pressure release. That’s roughly a third of the unsoaked cook time.
The math works in your favor if you’ve planned ahead. While the beans need their overnight soak (we typically cover them by about three inches and leave them on the counter), the actual pressure cooking is quick. Factor in about 10 minutes for the pot to come to pressure, then your 12-15 minutes of cooking, then the 10-minute natural release. You’re looking at around 35-40 minutes of hands-on Instant Pot time, compared to over an hour with the no-soak method.
The catch is that advance planning. You need to remember to soak your chickpeas the night before, or at minimum eight hours ahead. For meal preppers and Sunday batch-cookers, this timing feels natural. For spontaneous weeknight cooking, not so much. We’ve also noticed soaked chickpeas can maintain a slightly firmer bite, which works beautifully when you’re tossing them into salads or grain bowls where you want them to hold their shape rather than melt into the dish.
Pressure Setting for Both
Both soaked and unsoaked chickpeas cook at the same High Pressure setting in your Instant Pot. The critical step for either method is allowing at least 10 minutes of natural pressure release before venting any remaining steam. We found this natural release prevents splitting and keeps the chickpeas intact with tender skins. Quick release causes the sudden pressure drop to burst the beans, leaving you with a pot of mush instead of perfectly cooked legumes.
Texture & Results: What to Expect
No-Soak Texture
We tested unsoaked chickpeas in the Instant Pot multiple times and consistently got tender, creamy results that fell apart easily on a fork. The texture is super soft, which makes these chickpeas perfect for hummus, curries, and any recipe where you want the beans to break down and blend smoothly. The skins slip off with almost no effort, saving you the tedious task of peeling them one by one for silky-smooth dips.
Despite the softness, they hold their shape during cooking and don’t turn to mush. We found the texture ideal when we wanted chickpeas to melt into a dish rather than stand out as distinct bites. If you’re batch-cooking for the freezer or planning to mash the chickpeas into spreads, this ultra-tender result is exactly what you want.
The trade-off is that they won’t hold up as well in salads or grain bowls where you need chickpeas with more bite. For those applications, the soaked method delivers firmer results while still offering the convenience of pressure cooking.
Soaked Texture
When we cooked soaked chickpeas in our Instant Pot, we noticed they maintained a firmer, more distinct texture compared to the no-soak batch. After draining chickpeas that had sat in water overnight and pressure cooking them for 12 minutes followed by natural release, they came out tender but still held their shape beautifully. The skins stayed mostly intact, and each bean had a slight bite to it rather than the melt-in-your-mouth softness of unsoaked chickpeas.
This firmer texture makes soaked chickpeas ideal when you want beans that stand out as a visible ingredient. We found them perfect for tossing into grain bowls where they need to hold up against other ingredients, layering into salads where you want distinct bites of chickpea, or adding to roasted vegetable dishes. They also work well for recipes like chickpea curry where you want the beans to maintain their integrity through reheating.
If you’re planning to mash or blend your chickpeas, the firmer texture from soaking might require a bit more work, which is why we typically reserve this method for whole-bean applications.
Who Should Choose Which Method
Choose No-Soak If…
The no-soak method is your best bet when convenience trumps everything else. If you’re standing in your kitchen at 5 pm realizing you forgot to prep chickpeas for tonight’s dinner, this approach saves the day. You can go from pantry to cooked beans in about 1 hour 25 minutes without any advance planning, and honestly, that’s a game-changer for busy weeknights.
This method also shines when you’re making hummus, dips, or any recipe where you want ultra-creamy chickpeas. We’ve found that the extended cook time produces super soft beans with skins that slip off easily, perfect for blending into silky-smooth dips. The texture is tender without being mushy, but it won’t hold its shape as distinctly as soaked chickpeas might.
Batch cooking for the freezer? Go no-soak. You can cook several cups at once, portion them into containers, and have ready-to-use chickpeas on hand for weeks. The time difference between methods matters less when you’re preparing large quantities, and you’ll eliminate the need for multiple cans, cutting down on packaging waste significantly. If your priority is getting it done without thinking ahead, no-soak delivers every time.
Choose Soaking If…
Soaking makes sense if you regularly meal prep on weekends or evenings when you can plan ahead. If you soak chickpeas overnight or for at least 4 hours, you’ll cut your active cooking time to just 12-15 minutes at high pressure plus a 10-minute natural release, roughly half the pressure time of the no-soak method. This shorter cook window matters when you’re prepping multiple dishes simultaneously or working with limited kitchen time on cooking day.
We find soaking particularly useful when you want chickpeas that hold their shape better in cold salads, grain bowls, or Mediterranean platters where you need distinct beans rather than ultra-soft ones. Soaked chickpeas tend to cook slightly firmer, making them less prone to breaking apart when tossed with dressings or roasted for crunchy snacks.
Soaking also works well for smaller batches where shaving 30 minutes off cook time feels meaningful, or when you’re already in a meal-prep routine and can start the soak alongside other advance tasks. If you cook chickpeas weekly and have the fridge space, keeping a container of soaked beans ready transforms your weeknight routine.
Tips for Success with Either Method
Regardless of which method you choose, a few simple practices will help you get consistently great results and make the most of your batch.
Salt your cooking water generously, about a teaspoon per cup of dried chickpeas. We found this seasons the beans throughout rather than just on the surface, and despite old warnings, it doesn’t toughen them in the Instant Pot’s pressurized environment. Add a bay leaf or garlic cloves to the pot for extra flavor if you like.
You’ll know your chickpeas are done when they’re tender enough to squash easily between your fingers but still hold their shape. If they’re slightly firm after the initial cook time, simply reseal the lid and cook for another 5 minutes at high pressure.
Store cooked chickpeas in their cooking liquid, this prevents them from drying out and extends their fridge life to about five days. For longer storage, drain them well and freeze in portions you’ll actually use. We pack ours in 1.5-cup portions (roughly one can’s worth) in reusable containers or bags, which makes it easy to grab exactly what you need for a recipe. Frozen cooked chickpeas keep for three months and thaw quickly under running water.
If your chickpeas turn out mushy, you’ve likely overcooked them or used beans that were very old. Next time, reduce the cook time by 5 minutes. Conversely, if they’re unevenly cooked with some hard centers, your batch may have included beans of different ages, older beans take longer to soften.
One waste-reducing tip: save that starchy cooking liquid. It works beautifully as a thickener for soups or even as aquafaba for vegan baking projects, giving you two useful ingredients from one cook.
Common Questions About Instant Pot Chickpeas
We’ve tested both methods extensively in our kitchen, and these questions come up again and again from readers learning to cook dried legumes at home. Here are the answers that’ll save you time and frustration.
Do I really not need to soak chickpeas for the Instant Pot?
No soaking is required, one of the Instant Pot’s biggest advantages. Unsoaked chickpeas cook perfectly in 45 minutes at high pressure followed by a 10-minute natural release, yielding tender beans without any advance planning.
Can I cook chickpeas straight from frozen?
Yes, you can cook frozen chickpeas in the Instant Pot using the same timing as the no-soak method. Add a couple of extra minutes to account for the frozen state, and ensure there’s enough liquid in the pot.
How long do cooked chickpeas last in the fridge?
Cooked chickpeas keep for 4-5 days in an airtight container in the refrigerator, or up to 3 months in the freezer. Batch-cooking dried chickpeas gives you a ready supply without the waste of half-used cans, helping you use wasted food more effectively.
Why did my chickpeas stay hard after cooking?
Old chickpeas take longer to soften, beans older than a year may need an extra 10-15 minutes. Also ensure you used natural pressure release rather than quick release, which can leave the centers undercooked.
The beauty of the Instant Pot is its forgiving nature. If your chickpeas aren’t quite tender enough after the initial cook time, simply seal the lid and pressure cook for another 5-10 minutes. You can’t really overcook them to the point of being inedible, they’ll just get softer, which works perfectly for hummus and spreads.
One detail we’ve found crucial: always use natural pressure release for at least 10 minutes. Quick release can cause the skins to separate and burst, leaving you with mushy beans and a messy pot. The natural release allows the beans to finish cooking gently in the residual heat, giving you that perfect tender texture throughout.
For meal preppers, cooked chickpeas freeze beautifully in their cooking liquid. Portion them into containers or freezer bags, and you’ve got the convenience of canned chickpeas without the packaging waste or sodium. We keep a rotating supply in our freezer, pulling out portions as needed for quick weeknight meals.
What each option is
Both the soaked and no-soak methods start with the same ingredient, dried chickpeas from your pantry, and end with perfectly cooked legumes ready for any recipe. The difference lies in timing and preparation, not in the final quality.
The no-soak method means you can go straight from dried chickpeas to cooked beans without any advance planning. You rinse the dried chickpeas, add them to your Instant Pot with water, and pressure cook for 45 minutes followed by a 10-minute natural release. We’ve found this approach delivers perfectly tender chickpeas with skins that slip off easily, making them ideal for hummus and purees. The total commitment is about an hour and a half, but it’s all hands-off time.
The soaked method requires covering dried chickpeas in water for several hours or overnight before cooking. This pre-soak softens the beans, cutting the pressure cooking time to just 12-15 minutes at high pressure, plus the same 10-minute natural release. While you’ll need to plan ahead, the reduced cook time and slightly firmer texture work beautifully for salads and grain bowls.
Both methods help you save food by making dried legumes accessible, reducing your reliance on canned goods and their packaging waste.
Dimension-by-dimension comparison
When we tested both methods side by side in our kitchen, the differences became clear across four key dimensions. Time commitment is where they diverge most dramatically: no-soak chickpeas need 45 minutes at high pressure plus a 10-minute natural release (around 1 hour 25 minutes total when you factor in pressurization), while soaked chickpeas cook in just 12-15 minutes at high pressure with the same natural release, though you’ve already invested overnight soaking time. Texture tells the next part of the story. Our no-soak batches came out super soft with skins that slipped off easily, perfect for creamy hummus but still holding their shape in grain bowls. Soaked chickpeas yielded a slightly firmer bite that stayed intact in salads and held up better when we stirred them into dishes.
Convenience heavily favours the no-soak method, we loved pulling chickpeas straight from the pantry with zero planning, while soaking demands you remember the night before. Finally, the cost and sustainability advantage applies equally to both: cooking dried chickpeas at home helps you save money compared to canned and eliminates all that packaging waste, no matter which method you choose.
Key Terms
Understanding a few essential terms will help you achieve perfect chickpeas in your Instant Pot every time. Here are the key concepts that matter most when you’re cooking dried legumes under pressure:
- Natural Pressure Release (NPR)
- Allowing the Instant Pot to depressurize on its own without manually releasing the steam valve. This gradual process prevents chickpea skins from splitting and ensures even cooking throughout.
- High Pressure Setting
- The standard pressure cooking mode used for both soaked and unsoaked chickpeas, typically around 10-12 psi. This setting ensures the beans cook thoroughly while maintaining their structure.
- Pressurization Time
- The period before actual cooking begins when the Instant Pot builds up steam and reaches pressure. For chickpeas, this typically takes about 25 minutes and isn’t included in the recipe cook time.
- Batch Cooking
- Preparing large quantities of chickpeas at once to freeze in portions for future meals. This practice makes food waste heroes out of home cooks by reducing reliance on single-use canned goods and maximizing the efficiency of dried legumes.
These terms apply to both the soaked and no-soak methods, though the timing and texture outcomes vary between approaches. Getting comfortable with these basics will help you troubleshoot any issues and adapt recipes to your preferences.
Whether you choose the hands-off convenience of the no-soak method or the slightly faster cook time of soaked chickpeas, you’re making a smart choice for your kitchen and the planet. We’ve tested both approaches extensively, and honestly, you can’t go wrong, the Instant Pot delivers tender, delicious chickpeas either way.
The real win here goes beyond convenience. Every batch of dried chickpeas you cook at home means one less can in the recycling bin, less packaging waste in our landfills, and often significant savings at checkout. For Canadian home cooks looking to reduce their environmental footprint without sacrificing ease or flavor, mastering Instant Pot chickpeas is a genuine game-changer for your sustainable kitchen routine.
Our recommendation? Try both methods. Cook a no-soak batch when you need chickpeas tonight, then plan ahead and soak some for your weekend meal prep. You’ll quickly discover which approach fits your cooking style, and you might find yourself switching between them depending on what’s for dinner. The flexibility is part of what makes this technique so valuable, and so achievable for busy households committed to wasting less.